Springboot Actuator可以实现对springboot应用程序的各项指标进行检测,结合Springboot Admin即可完成检测数据可视化。本次将记录一次个人主页添加actuator的简单功能实现。
添加actuator
首先需要给当前工程引入依赖。
<dependency>
<groupId>org.springframework.boot</groupId>
<artifactId>spring-boot-starter-actuator</artifactId>
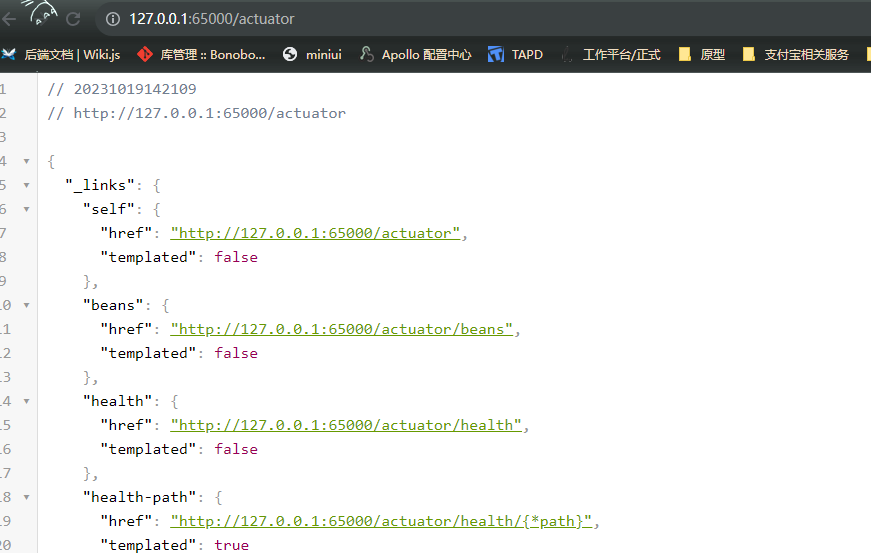
</dependency> 这时候,访问 /actuator 路由即可发现生效了。当然默认的只暴露了 health、actuator 这两个功能的路由,如果需要额外扩展,需要添加如下配置:
management:
  endpoints:
    web:
      exposure:
        include:
          - health
          - beans
          - metrics
          - scheduledtasks
          - env
          - heapdump
          - mappings
beans :表示spring容器中的所有注册的类,含依赖关系展示;
metrics:记录了一些指标信息(如内存使用情况、cpu使用情况、垃圾回收情况等);
scheduledtasks:可以显示所有设置的定时任务及cron表达式;
env:展现了所有的配置信息,包括系统的和自己额外配置的;
heapdump:可以dump对当前的堆信息;
mappings:包含了所有的映射信息,可以通过这个检查指定的接口是否被注册到。
当然,这些只是一部分,官方还提供了一些其他的检测内容,并且可以自定义一些endpoint进行检测,本次重点是搭建与应用,所以就不多赘述了。
默认的,actuator使用的端口号是与应用程序共享,不过因为actuator中包含的信息,如果暴露,很有可能存在安全隐患,所以重新指定一个端口,并且通过防火墙将其保护。更严格的,可以限制访问的ip。
management:
  server:
    port: 65000
添加admin-client
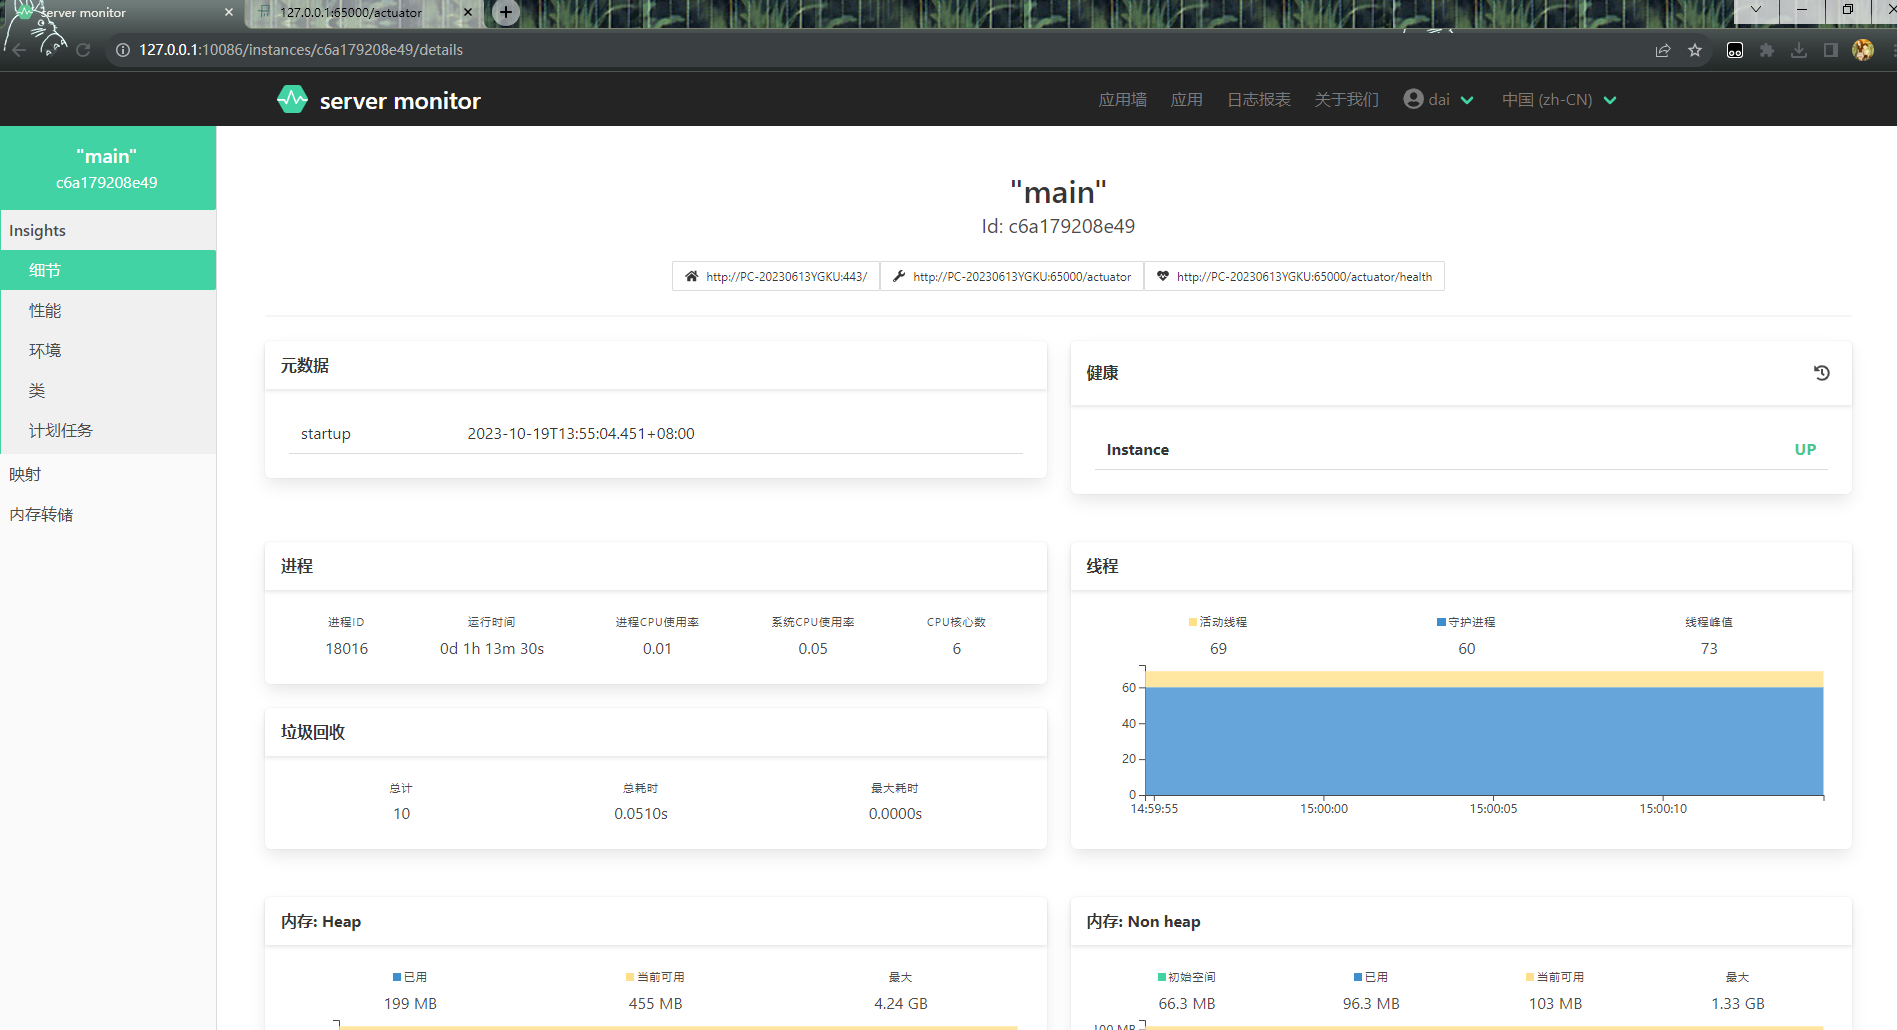
上面的actuator所获得的结果是一个个的json数据,通过这些数据可以自行设计前端页面进行访问,当然也有一个现成的可视化产品spring-boot-admin。
现在,我们的个人主页已经添加了actuator功能,属于客户端,引入客户端的依赖:
<dependency>
    <groupId>de.codecentric</groupId>
    <artifactId>spring-boot-admin-starter-client</artifactId>
    <version>2.5.1</version>
</dependency>
进行如下配置,其中username和password为服务端要配置的用户名和密码,url为服务端的地址。这个配置表示的含义为:向指定的一个或多个url地址发送我们的检测信息。
spring:
  boot:
    admin:
      client:
        username: xxxx
        password: "xxxxxx"
        url:
          - http://localhost:10086
设置应用在服务端显示的名称,可以通过配置 spring.application.name 实现。
添加admin-server
单独开一个工程,引入如下依赖。
<dependency>
    <groupId>org.springframework.boot</groupId>
    <artifactId>spring-boot-starter-web</artifactId>
</dependency>

<dependency>
    <groupId>de.codecentric</groupId>
    <artifactId>spring-boot-admin-starter-server</artifactId>
    <version>${admin.version}</version>
</dependency>

<dependency>
    <groupId>org.springframework.boot</groupId>
    <artifactId>spring-boot-starter-security</artifactId>
</dependency>
主要有两个模块,安全与admin服务。
❀ 安全模块
先来看安全的配置,实现安全配置的适配器,直接复制就好~
import de.codecentric.boot.admin.server.config.AdminServerProperties;
import org.springframework.context.annotation.Configuration;
import org.springframework.security.config.annotation.web.builders.HttpSecurity;
import org.springframework.security.config.annotation.web.configuration.WebSecurityConfigurerAdapter;
import org.springframework.security.web.authentication.SavedRequestAwareAuthenticationSuccessHandler;


@Configuration(proxyBeanMethods = false)
public class SecuritySecureConfig extends WebSecurityConfigurerAdapter {

    private final String adminContextPath;

    public SecuritySecureConfig(AdminServerProperties adminServerProperties) {
        this.adminContextPath = adminServerProperties.getContextPath();
    }

    @Override
    protected void configure(HttpSecurity http) throws Exception {
        SavedRequestAwareAuthenticationSuccessHandler successHandler = new SavedRequestAwareAuthenticationSuccessHandler();
        successHandler.setTargetUrlParameter( "redirectTo" );

        http.authorizeRequests()
                .antMatchers( adminContextPath + "/assets/**" ).permitAll()
                .antMatchers( adminContextPath + "/login" ).permitAll()
                .anyRequest().authenticated()
                .and()
                .formLogin().loginPage( adminContextPath + "/login" ).successHandler( successHandler ).and()
                .logout().logoutUrl( adminContextPath + "/logout" ).and()
                .httpBasic().and()
                .csrf().disable();
    }
}
然后是安全的基础配置。
spring:
  security:
    user:      name: xxx
      password: "xxxxx"
❀ admin服务端模块
第一步是启用该服务,给 Application 添加 @EnableAdminServer 注解,如下所示:
import de.codecentric.boot.admin.server.config.EnableAdminServer;
import org.springframework.boot.SpringApplication;
import org.springframework.boot.autoconfigure.SpringBootApplication;

@EnableAdminServer
@SpringBootApplication
public class AdminApplication {
    public static void main(String[] args) {
        SpringApplication.run(AdminApplication.class, args);
    }
}
此时,其实就已经完成了检测服务端的搭建了。不过还有一些细节需要处理,
# 设置登录时显示的标题spring.boot.admin.ui.title=server monitor# 设置导航栏的brand内容 spring.boot.admin.ui.brand=<img src="assets/img/icon-spring-boot-admin.svg"><span>server monitor</span># 限制可选的语言(没必要那么多) spring.boot.admin.ui.available-languages = zh-CN
这样,再次启动就完成了搭建。
期间遇到的一些问题解决
当然期间不是一帆风顺的,也遇到一些问题。
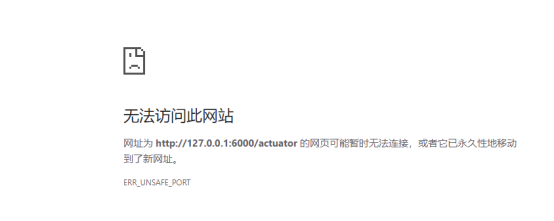
🍬 ERR_UNSAFE_PORT 这个问题的原因比较简单,就是端口号设置到保留的端口了,需要换一个端口号以避开特殊端口值。
🍬 版本报错。 这个的原因是springboot和springboot admin的版本不兼容导致的,需要变更版本到合适即可。

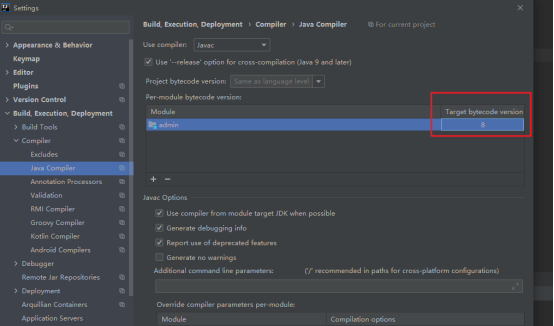
🍬 无效发行版本。这种通常是编译器版本设置的高了,需要变更一些基础配置以适配。

前往设置去变更目标的字节码版本即可。
🍬 无客户端总是隔一段时间就断开。原因是一些发送时间没设置好,比较简单的方式就是修改服务器端的重试时间。
spring.boot.admin.monitor.default-retries = 3